How to Clean Leather Furniture
Your leather couch might be the centerpiece of your living room, but how often do you give it the care it deserves? From spills to scratches, it’s important to know how to clean a couch made of leather—and with the right cleaning techniques, it can stay stunning for years to come. The best part? You don’t need fancy cleaners or expert tools to maintain its luxurious feel. Let’s explore how to clean leather furniture, including the best tips and the most common mistakes to avoid. Understanding leather types The type of leather on your furniture determines not only how it looks but also how it holds up to cleaning products and methods. Here are some common types of leather found in furniture:- Full Grain Leather: This is the highest quality leather, made from the top layer of the hide with all its natural grain. It's durable and develops a patina over time.
- Top Grain Leather: Slightly sanded and treated, top grain leather is more uniform in appearance and resistant to stains than full grain leather.
- Split Grain Leather: Derived from the lower layers of the hide, split grain leather is less durable and often has an artificial layer applied to mimic higher-quality leather.
- Bonded Leather: Made from leftover scraps bonded together, this type is less durable and tends to wear out more quickly.
- Nubuck Leather: Sanded to create a soft, suede-like texture, nubuck is prone to staining and requires careful maintenance.
- Bi-Cast Leather: A split leather with a polyurethane coating, bi-cast leather has a consistent appearance but can crack over time.
- Faux Leather: A synthetic alternative that mimics real leather's appearance; it's more affordable but less durable.
For ink stains: Dab with rubbing alcohol using a cotton swab.
For protein-based stains like food or blood: Apply cornstarch or non-gel toothpaste to absorb the residue.
Oil or grease stains: Sprinkle baking soda or cornstarch over the area and let it sit to absorb the oil before gently wiping it away.
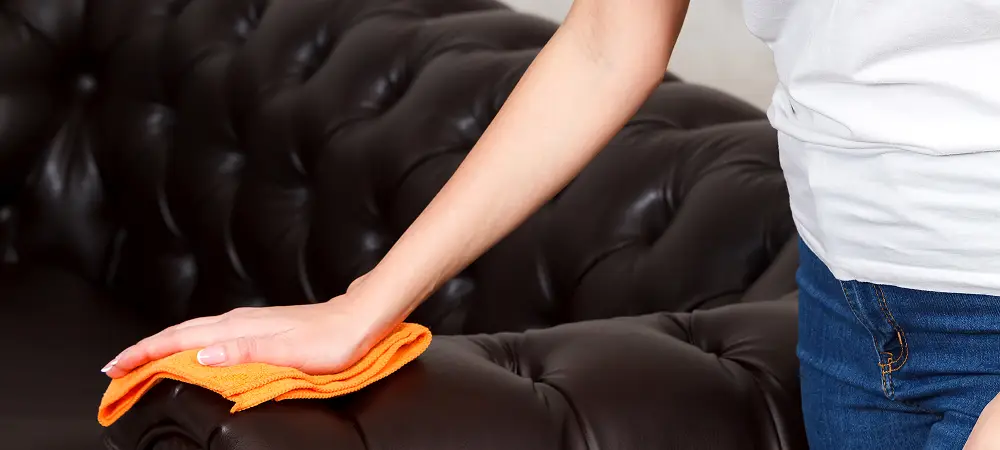
Dye transfer (from clothing): Use a leather-safe cleaner and a soft cloth to lift the stain without spreading it. 4. Dust your furniture first Dusting may seem minor, but it can do wonders in protecting your leather furniture. Use a soft, dry cloth to remove dust and dirt. This prevents tiny particles from acting like sandpaper and scratching the leather during the cleaning process. For hard-to-reach areas, a vacuum with a soft brush attachment works well. 5. Spot test before cleaning Before applying any cleaning solution, choose a hidden spot—like the underside of a cushion—and test a small amount. Gently apply the solution and let it sit for a few minutes. Check for discoloration, fading, or damage. 6. Clean Gently When cleaning, less is more. Lightly dampen your cloth with the cleaning solution—never soak it—and wipe the leather in small, circular motions. Focus on one section at a time to avoid spreading dirt around, and don’t scrub too hard if you want to avoid cracks. 7. Dry and condition After cleaning, use a soft, dry cloth to remove any lingering moisture, as excess water can weaken the leather over time. Once dry, apply a leather conditioner to restore lost oils and keep the surface soft and supple. Use a small amount and buff it into the leather with a clean cloth, following the grain for even coverage. Common mistakes to avoid While cleaning leather furniture can seem straightforward, small missteps can have big consequences. For example, using the wrong products—like bleach, ammonia, or abrasive tools—can permanently damage your leather. These harsh cleaners strip away natural oils, leaving the surface prone to cracking and discoloration. Rushing the cleaning process or neglecting to spot test can lead to costly mistakes, too. Always take the time to test your solution on a hidden area and clean gently to preserve the leather’s texture and finish. Leather conditioning Conditioning your leather furniture is like giving it a spa day. While cleaning removes dirt, it can also strip essential moisture that keeps leather soft and supple, which is why conditioning matters. Here are 5 steps to condition your leather furniture:
1. Start with clean leather
Always clean your furniture before conditioning. Dirt and grime can prevent the conditioner from absorbing properly.
2. Choose the right product
Select a high-quality leather conditioner specifically designed for your furniture’s type of leather. Avoid products with heavy oils or waxes that can leave a sticky residue.
3. Test in a hidden area
Before applying conditioner to the entire surface, test a small amount on an inconspicuous spot to ensure compatibility.
4. Apply in small amounts
Using a clean, soft cloth, apply a small amount of conditioner in circular motions. Work section by section to ensure even coverage.
5. Buff to a shine
Allow the conditioner to sit for a few minutes, then use a dry cloth to buff the surface gently. This step restores the leather’s natural sheen and ensures there’s no leftover residue.
Keep in mind that antique leather furniture often requires extra care to preserve its unique character. Use gentle, pH-balanced products designed for older leather, and avoid over-conditioning, which can soften the material excessively.
Long-term leather care tips
Protecting your leather furniture isn’t just about cleaning—it’s about developing habits that maintain its beauty over time. Here are some simple tips to keep your leather looking its best long-term.
Always clean your furniture before conditioning. Dirt and grime can prevent the conditioner from absorbing properly.
2. Choose the right product
Select a high-quality leather conditioner specifically designed for your furniture’s type of leather. Avoid products with heavy oils or waxes that can leave a sticky residue.
3. Test in a hidden area
Before applying conditioner to the entire surface, test a small amount on an inconspicuous spot to ensure compatibility.
4. Apply in small amounts
Using a clean, soft cloth, apply a small amount of conditioner in circular motions. Work section by section to ensure even coverage.
5. Buff to a shine
Allow the conditioner to sit for a few minutes, then use a dry cloth to buff the surface gently. This step restores the leather’s natural sheen and ensures there’s no leftover residue.
- Prevent wear and tear: Use throw blankets or cushions in high-traffic areas to reduce stress on the leather. Rearrange furniture periodically to avoid uneven wear.
- Protect from sunlight and heat: Place your furniture away from direct sunlight and heat sources, which can cause fading and cracking. If this isn’t possible, use UV-blocking window treatments or furniture covers.
- Use a leather protectant: Apply a leather-safe protectant or sealant to guard against spills, stains, and scratches.
- Monitor humidity levels: Keep your home’s humidity between 40-60%. Too much moisture can cause mold, while too little can dry out the leather.
What’s the best thing to use to clean leather furniture?
A soft cloth and a gentle solution, such as two parts vinegar mixed with warm water, work well for most leather types. Always spot test first!
How can I make my leather couch look new?
It sounds simple, but regular cleaning, conditioning, and avoiding harsh chemicals is the best way to maintain its original look. For older pieces, consider a professional leather cleaner.
Can I use vinegar on leather?
Yes, but always dilute it with water (two parts water to one part vinegar) and spot test on an inconspicuous area before full application.
How often should I condition my leather furniture?
Condition leather every 6-12 months, or more frequently for high-use furniture or dry environments.


